This post will go over the process of designing and constructing a shelf to hold two snakes.
What + Why?
About a year after I got my first snake, I was given another one by someone else and had no good place to put it’s tank. Partly to save floor space, and partly as an excuse for a construction project, I wanted to build a shelf that could allow me to stack the two tanks vertically.
Goals/Requirements
Some of my goals and requirements for the project include:
- Low cost
- Clearance for overhead lighting on tanks
- Minimize specialty tool needs (eg. angled cuts, complex joinery, etc)
How?
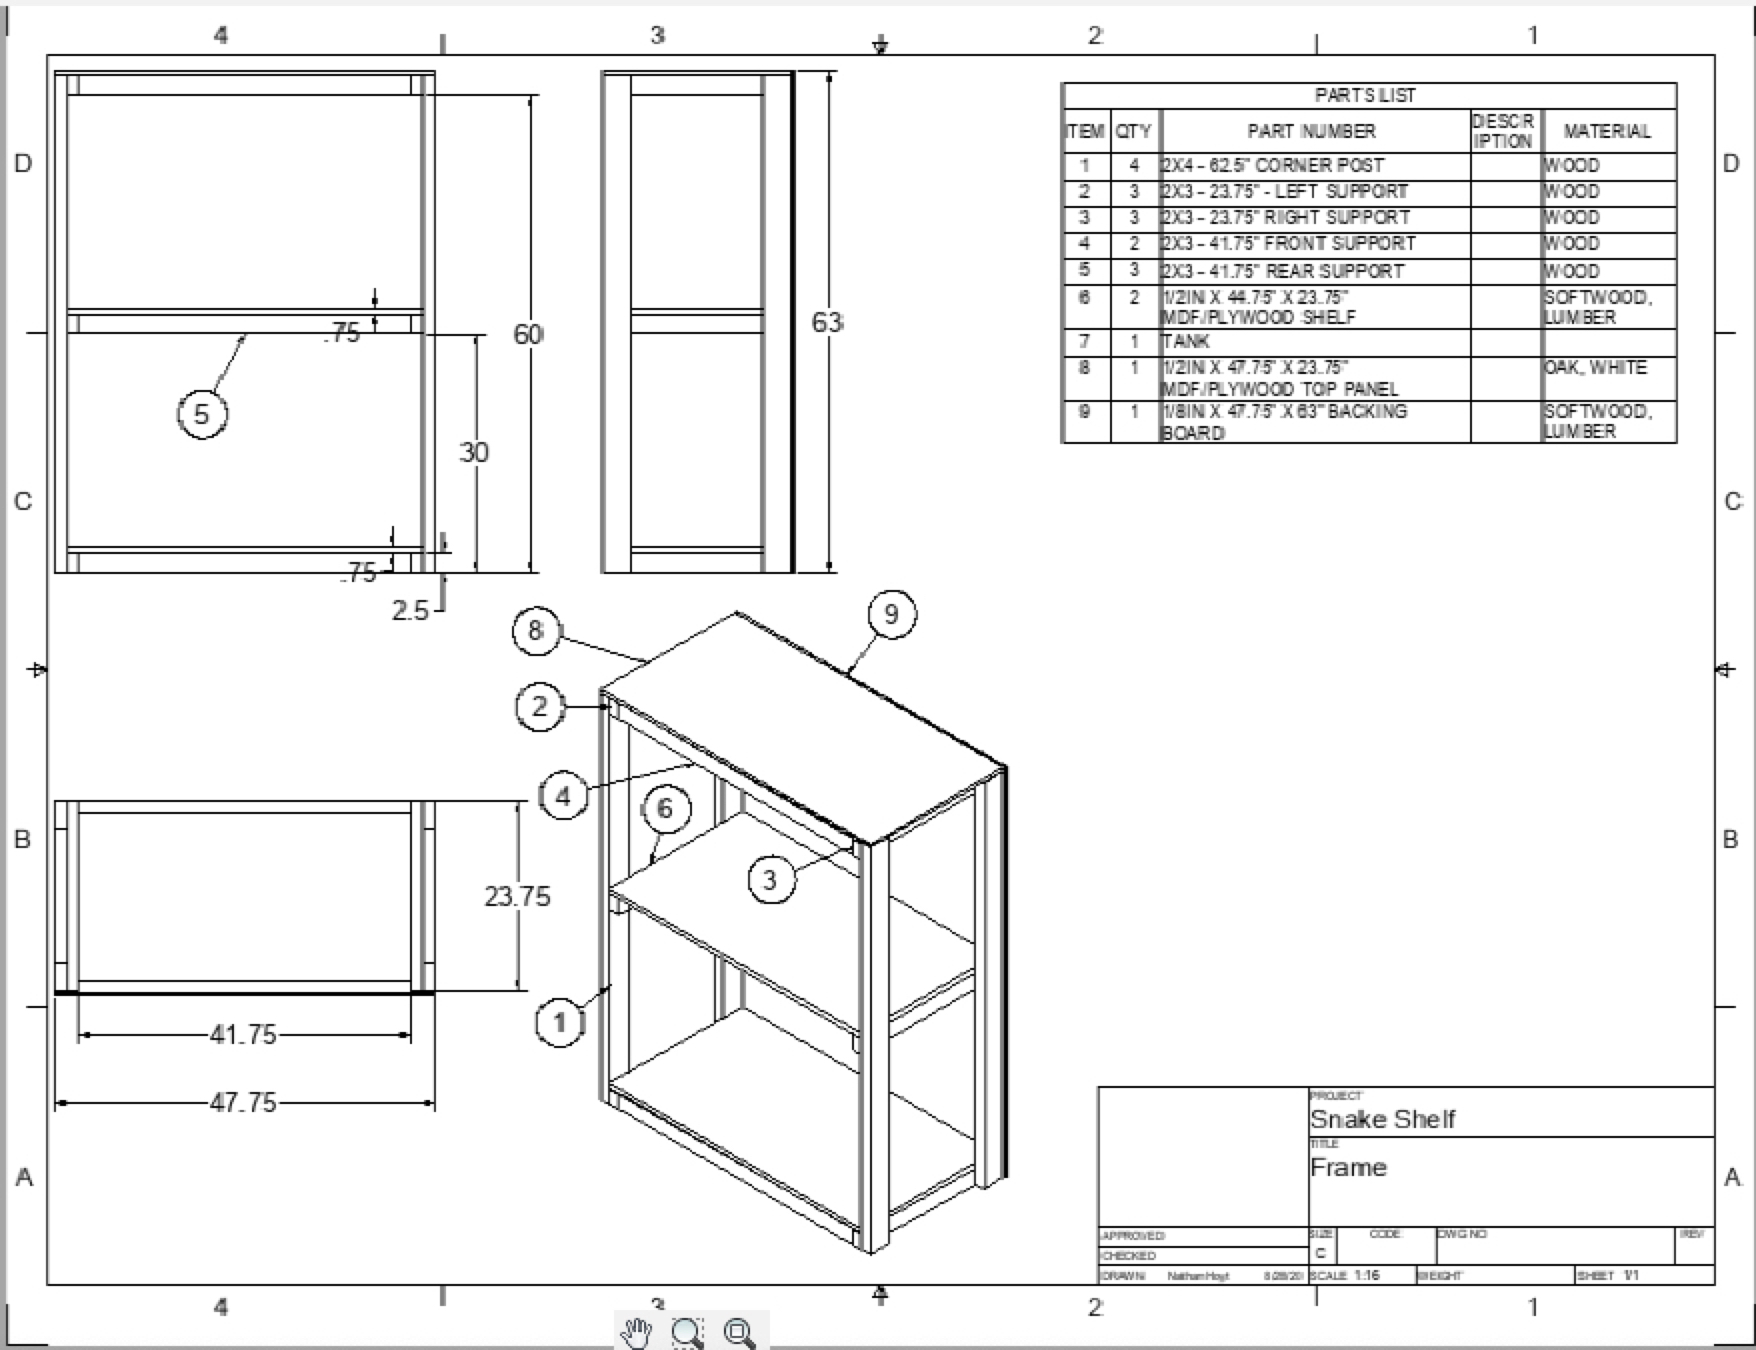
I started by gathering some dimensions for the tanks, and adding in some headroom for the lighting. This gave me some initial dimensions for clearance of each shelf. From there I decided that I could use a single piece of 4’x8’ panel board for the backing of the shelf and still fit all my size requirements, so I decided to design all the other dimensions to make that fit.
Design
Materials
Due to cost and simplicity constraints, I decided to use standard dimensional lumber with simple butt joints for this project. I decided to use 2x4’s for the corner posts, and 2x3’s for all the cross bracing/supports. The shelves are made of 1/2” MDF, and the back panel of 1/8” panel board.
CAD
After some paper sketches, the first step was designing the shelf in CAD to get a good idea of how it looks. I did some math to figure out how long each piece should be to make things fit within the 4’x8’ constraint of the back panel, and came up with a rough framing outline like this:
Then after adding the shelves and backing, the model looks like this:
Verification
Now that the design is nearing completion, I wanted to verify that the dimensions would all still fit the tanks with plenty of room left over, so I went ahead and designed a replica of the snake tank itself to put into the model and see how they look together:
And here’s how it looks together on the shelf:
s
Construction
Now that the design is complete and verified, time to start construction. Here is a list of necessary materials from the blueprint:
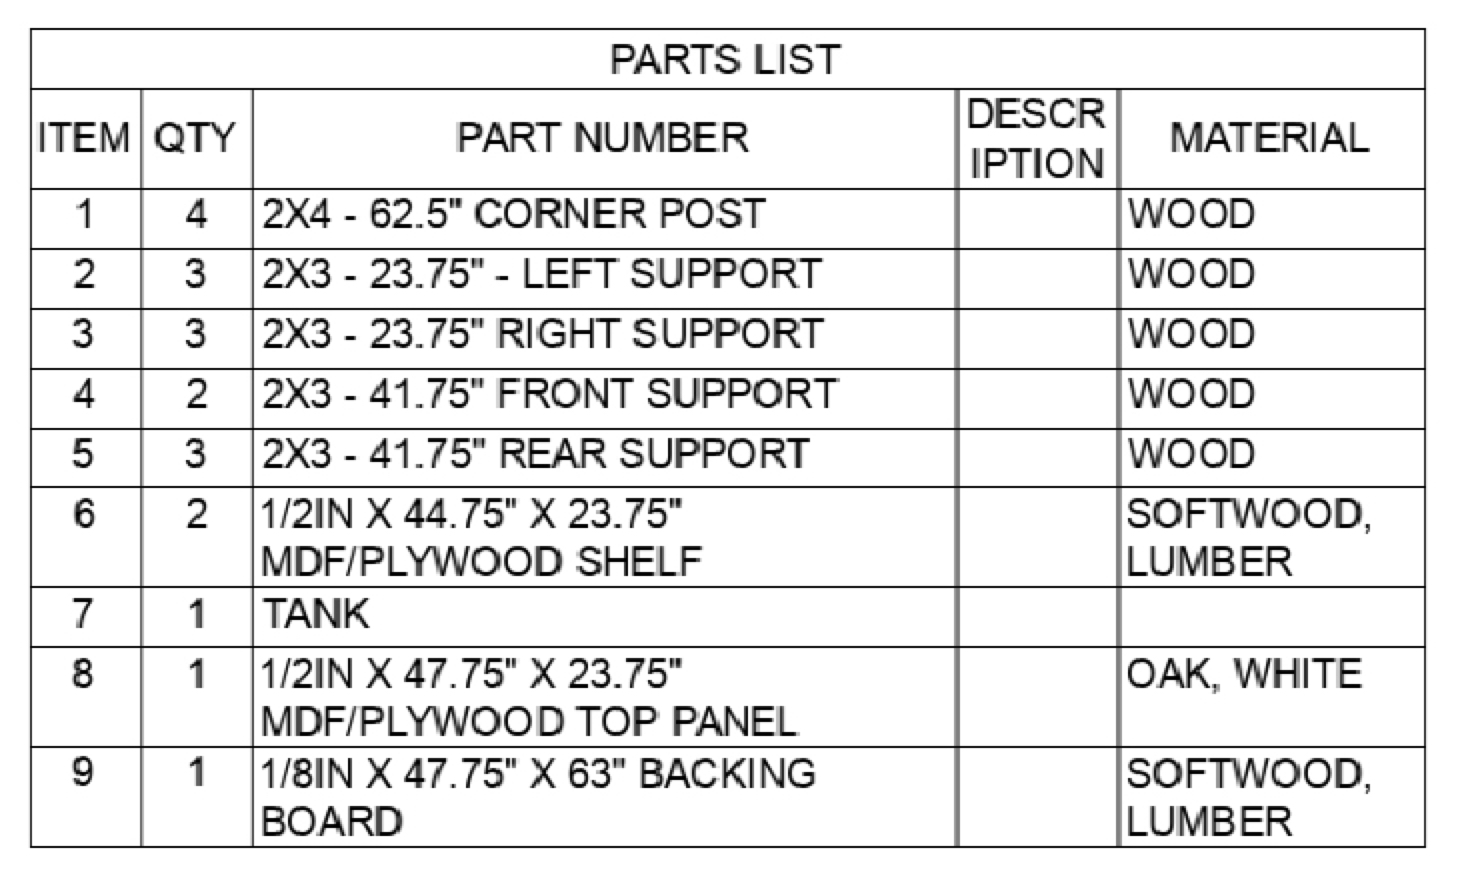
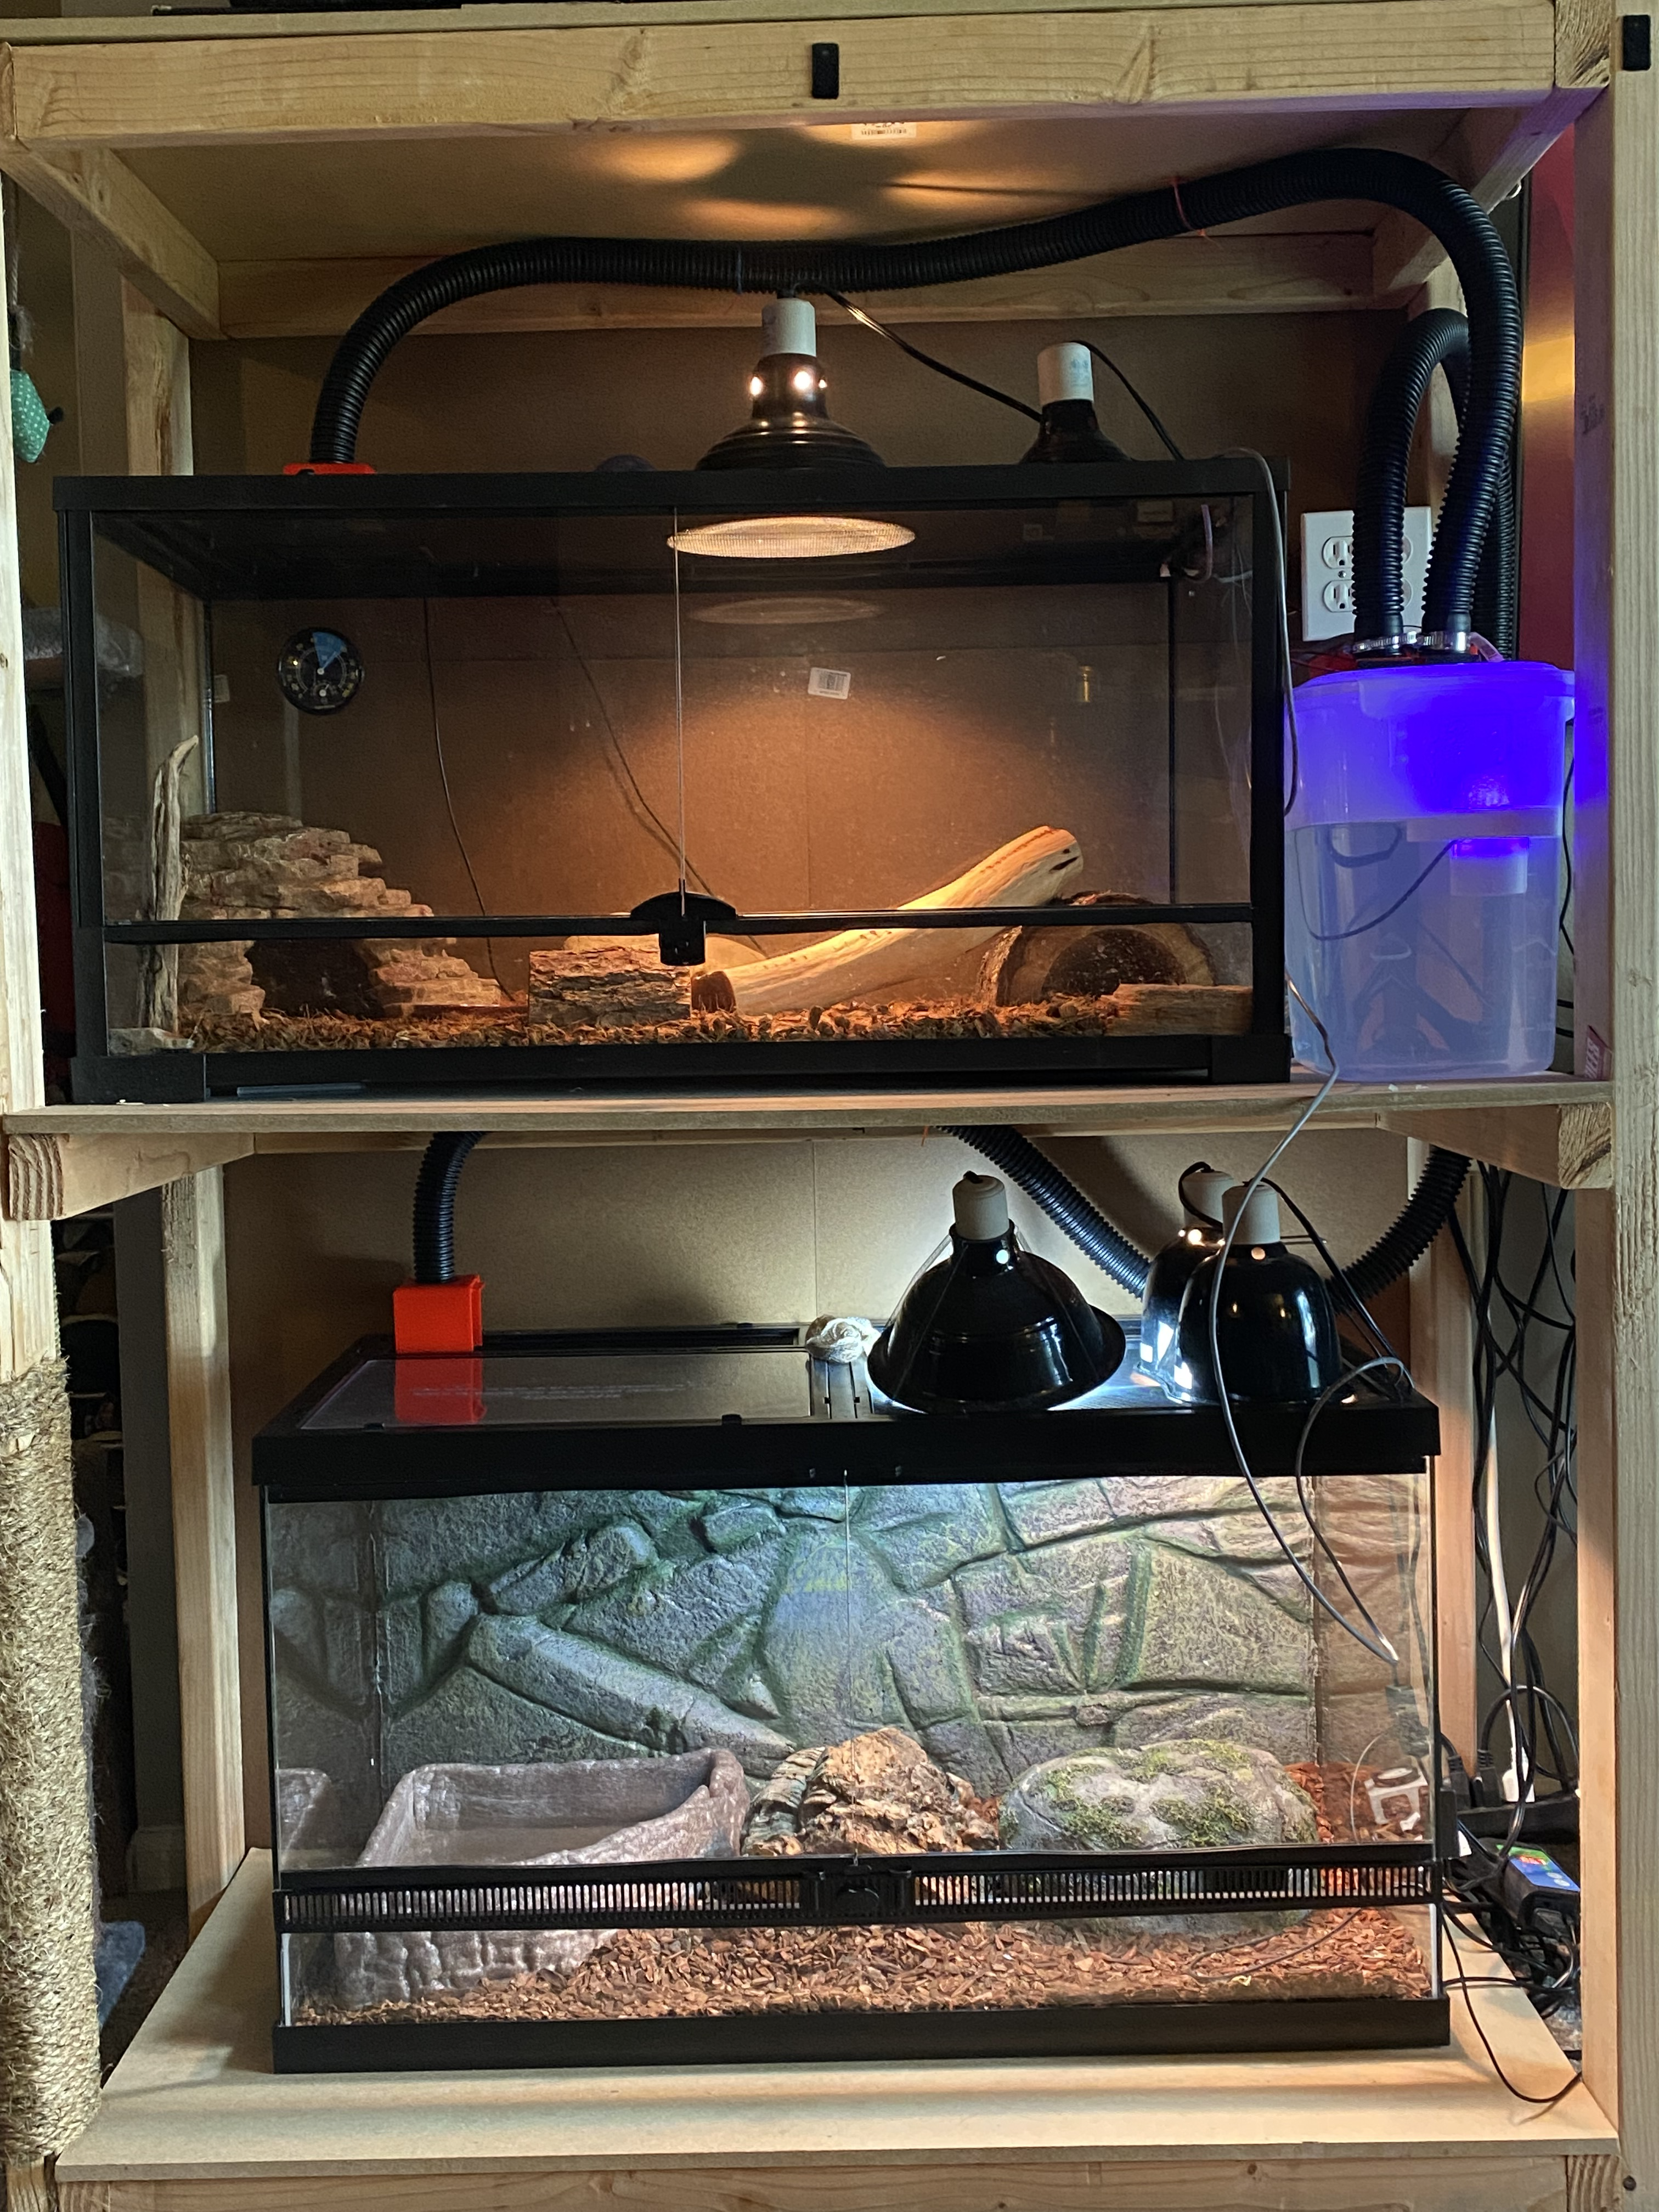
With this list I purchased all the necessary lumber, cut everything to the proper dimensions, and assembled the pieces of the frame with 1 1/2” and 2” wood screws. The shelves and baking board were all attached with trim nails to the frame. The final product is pictured below:
Final Thoughts
All in all, this was a fun project, and I learned a lot about designing with dimensional lumber in Fusion 360, as well as giving me some more construction experience.